Pattern Page
Pintuck Pillow Materials - by Linda Komljenovic
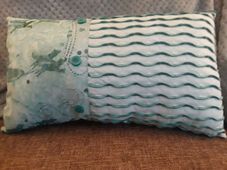
1. 3 coordinating fabrics, one of the fabrics a white or light shade
2. Light fabric cut 12” x 12”
3. Cut Second fabric 2” x 12”
4. 1/2 yard of third fabric, cut one piece 6” x 12”. The rest of the fabric will be used for the back of the pillow, which will be cut after finishing the front.
5. Thread for a 3 thread overlock (narrow width) to contrast against the light fabric and complement the other two fabrics. (Can use two different colors in the loopers.)
6. All purpose thread to match fabrics
7. Water soluble marker
8. Quilting ruler, pins or clips, scissors or rotary cutter
Bun Server
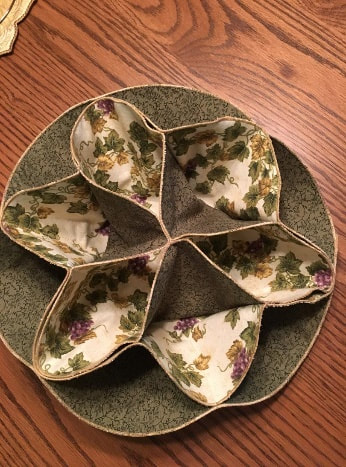
Serger Bun Server
Materials list:
½ yard each of two coordinating cotton fabrics
Serger thread for rolled hem – one may be woolly nylon but not necessary
All purpose thread to coordinate with both fabrics
3 small snaps
Serger, cord, foot pedal and instruction manual
Basic sewing supplies including pins, sewing needles, scissors, wonder clips (optional), 18 inch ruler, marking pen such as Frixion or any disappearing marker, Best Press or starch (optional), pencil
Preparation:
Prior to class cut each fabric into three 13-1/2-inch circles (total 6 circles). To do this make a template out of heavy paper, two layers of freezer paper or poster board. Trace circles onto fabrics and cutout. Bring templates to class so markings from my template can be transferred to your template. IMPORTANT: Bring the left-over scraps of fabric to class. You will need these to test rolled hem stitch on your serger.
I will bring my sewing machine which will be needed to construct bun server after the serging step.
This project will teach you how to do a rolled hem on a circle. After the serging is complete I will demonstrate the steps to assemble bun server.
Community Road Project Patterns please click here
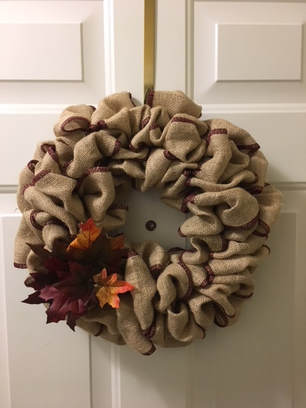
Burlap Door Wreath
Materials List
Three spools serger thread (color should contrast with color of burlap)
12-inch wire wreath frame
2 yards burlap
Fabric scissors
Floral wire
Needle nose pliers/cutters or utility scissors
Floral picks or other decorative item to fit theme of wreath
Prepare burlap as follows:
Construction of wreath:
1. Gather the end of a burlap strip securing gathers by winding with a piece of wire. Wire it onto the wreath frame to hold the end in place while you start the wreath.
2. Pull a loop of burlap strip through the wires of the wreath frame working from back to front. Lift the loop and fluff it out to the size you want the wreath to be (approximately 2 or 3 inches).
3. Pull the next loop up through the next opening in the frame – you will be working through first the outer ring, then the middle and then center ring. Repeat back and forth until you completely hide the wire frame sliding the loops together to make space on the frame for more loops. There will be twice as many loops in the middle section as there are in the outer and center sections. Fluff, shape and adjust the wreath as you go to make your wreath look even. For a 12 inch frame you will use approx. one 72 inch strip per section. Wreath is divided into six sections hence you will need 6 strips. Note: Burlap varies in density of weave, therefore the number of strips needed may vary. Use floral wire if needed to secure any sections to wreath frame.
4. Decorate the wreath as desired.
Think Valentines Day, St, Patricks Day, 4th of July...you get it - any holiday or season will do.
***************************************************************************
Burlap Door Wreath
Materials List
Three spools serger thread (color should contrast with color of burlap)
12-inch wire wreath frame
2 yards burlap
Fabric scissors
Floral wire
Needle nose pliers/cutters or utility scissors
Floral picks or other decorative item to fit theme of wreath
Prepare burlap as follows:
- 1. Using fabric scissors, cut 5 inch X 72 inch strips of burlap. Cut these following the weave of the fabric. Six stripes should be enough, cut an extra if you wish. Good idea to trim end of each strip along the weave of the fabric. (It is not important to have each strip the exact same length)
- 2. Set up serger for a wide 3-thread overlock stitch. Test on a scrape of burlap adjusting stitch length until you get the desired look. Stitches should be close together so they appear to be solid from a distance. 3. Serge each long edge of the burlap strips trimming approx. 1/8 inch from each side. Resulting strips will be approx. 4-3/4 inch wide.
Construction of wreath:
1. Gather the end of a burlap strip securing gathers by winding with a piece of wire. Wire it onto the wreath frame to hold the end in place while you start the wreath.
2. Pull a loop of burlap strip through the wires of the wreath frame working from back to front. Lift the loop and fluff it out to the size you want the wreath to be (approximately 2 or 3 inches).
3. Pull the next loop up through the next opening in the frame – you will be working through first the outer ring, then the middle and then center ring. Repeat back and forth until you completely hide the wire frame sliding the loops together to make space on the frame for more loops. There will be twice as many loops in the middle section as there are in the outer and center sections. Fluff, shape and adjust the wreath as you go to make your wreath look even. For a 12 inch frame you will use approx. one 72 inch strip per section. Wreath is divided into six sections hence you will need 6 strips. Note: Burlap varies in density of weave, therefore the number of strips needed may vary. Use floral wire if needed to secure any sections to wreath frame.
4. Decorate the wreath as desired.
Think Valentines Day, St, Patricks Day, 4th of July...you get it - any holiday or season will do.
***************************************************************************
. January 2018
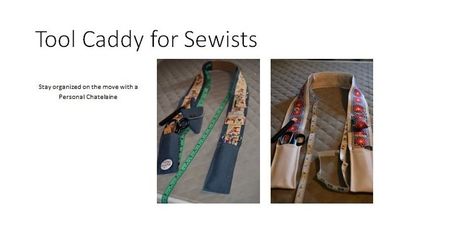
Slide Show download with Full Instructions for a Chatelaine Tool Caddy by Linda Price
linda_price_presentation.pptx
Click on the Below Photo to Start Presentation. Has 6 sec. delay and Pause
if you want.
~~~~~~~~~~~~~~~~~~~~~~~~~~~~~~~~~~~~~~~~~~~~~~~~~~~~~~~~
Slide Show download with Full Instructions for a Chatelaine Tool Caddy by Linda Price
linda_price_presentation.pptx
Click on the Below Photo to Start Presentation. Has 6 sec. delay and Pause
if you want.
~~~~~~~~~~~~~~~~~~~~~~~~~~~~~~~~~~~~~~~~~~~~~~~~~~~~~~~~
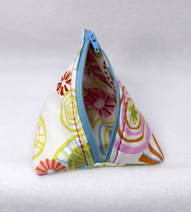
Group Project - Serged Pyramid Bag by Deb Fleming - November 14, 2017
Depending on the size, you will need two rectangles of fabric, one for the outside and one for the lining. 18'x24' pieces make a quite large bag, so two pieces that size will let you decide what size to make---One piece of iron on interfacing the same size as rectangle-- a polyester zipper a few inches longer than twice the height of the bag--that may be confusing, so I would say that a 26 inch zipper will be good for a bag that is approx. 12" high. That is the x-large bag. I would say bring a zipper at least 20" long.
Also, if you want a "handle at the top, a piece of grosgrain ribbon or extra strip of fabric to sew into a strap. (12" should be plenty)
*****************************************
***************
Holiday Basket - Serger Club
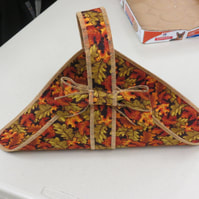
Holiday Basket Prepare Fabric
Supplies Needed Cut two 12.5” squares of cotton
5/8 yard cotton fabric one of Fast2Fuse (for base) and
1 / 4 yard paperbacked fusible web Cut two 2” x 30” strips of cotton and
7/8 yard Fast2Fuse or similar product one Fast2Fuse (for handle)
Three spools of thread to match or contrast Cut two 2” x 20” strips of cotton and
16 gauge wire (found in floral department) two 2” strips of the fusible web to make
Wire cutter a 2” x 20” strip (for bow)